how to mask an image in Photoshop
Masking an image in Photoshop is a helpful technique that allows you to hide or reveal certain parts of an image, giving you more control over your edits. Whether you want to blend multiple images, create special effects, or touch up a photo, mastering the art of masking in Photoshop is a valuable skill. In this guide, we will explore the various methods of masking an image in Photoshop and provide step-by-step instructions on how to achieve professional-looking results. So grab your mouse, and let’s dive into the world of masking in Photoshop.
Benefits of using Photoshop for image masking
1. Precision and accuracy: Photoshop offers precise and accurate tools for image masking, allowing you to achieve clean and seamless results.
2. Selection variety: There are various selection tools available in Photoshop for image masking, such as the pen tool, quick selection tool, and advanced masking options. This allows you to choose the tool that best fits your project’s requirements.
3. Time-saving: With advanced masking techniques, Photoshop can quickly and efficiently isolate complex objects from their backgrounds, reducing the time it takes to do it manually.
4. Fine-tuning options: Photoshop provides a range of fine-tuning options for image masking, such as feathering, smoothing, and adjusting the contrast, brightness, and color of the masked area. This results in a more realistic and professional-looking image.
5. Non-destructive editing: With Photoshop’s non-destructive editing capabilities, you can always go back and make changes to your mask without affecting the original image.
6. Compatible with other Adobe programs: Photoshop is part of the Adobe Creative Suite, making it easy to integrate with other Adobe programs like InDesign and Illustrator for a more comprehensive design process.
7. Quality results: Whether you are masking images for print or the web, Photoshop’s advanced algorithms and tools ensure high-quality results every time.
Understanding Image Masking in Photoshop
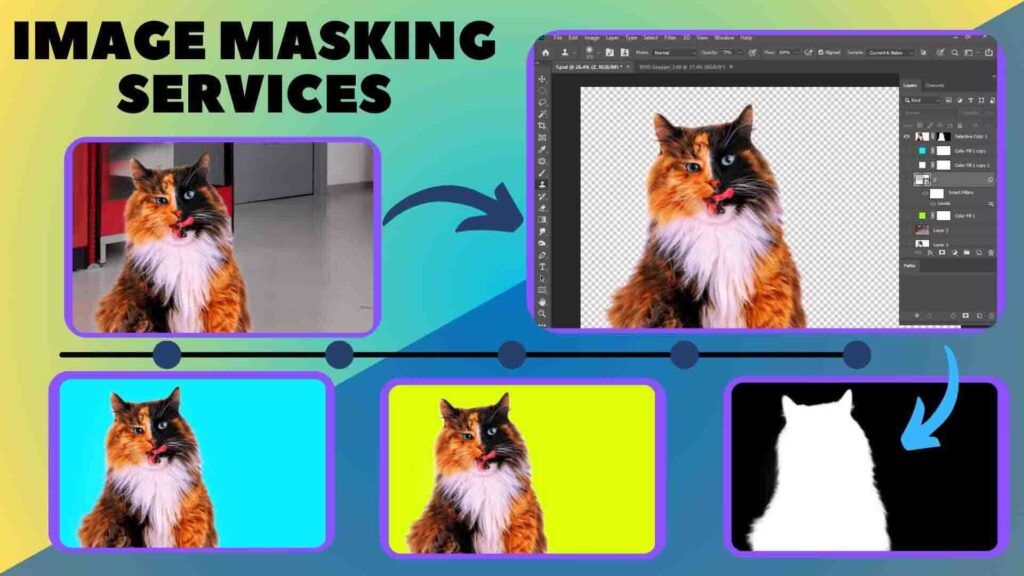
Image masking is a process of isolating specific areas or objects within an image by creating a mask. This mask acts as a protective layer that allows you to make changes or apply effects to the selected areas without affecting the rest of the image.
In Photoshop, different masking techniques can be used depending on the complexity of the image and the desired result. Some standard masking techniques include layer masks, clipping masks, vector masks, and alpha channel masks.
Layer masks are created on individual layers, allowing you to control the visibility of different parts of an image. Clipping masks are used to constrain the visibility of one layer to the shape of another layer, creating intricate designs and effects.
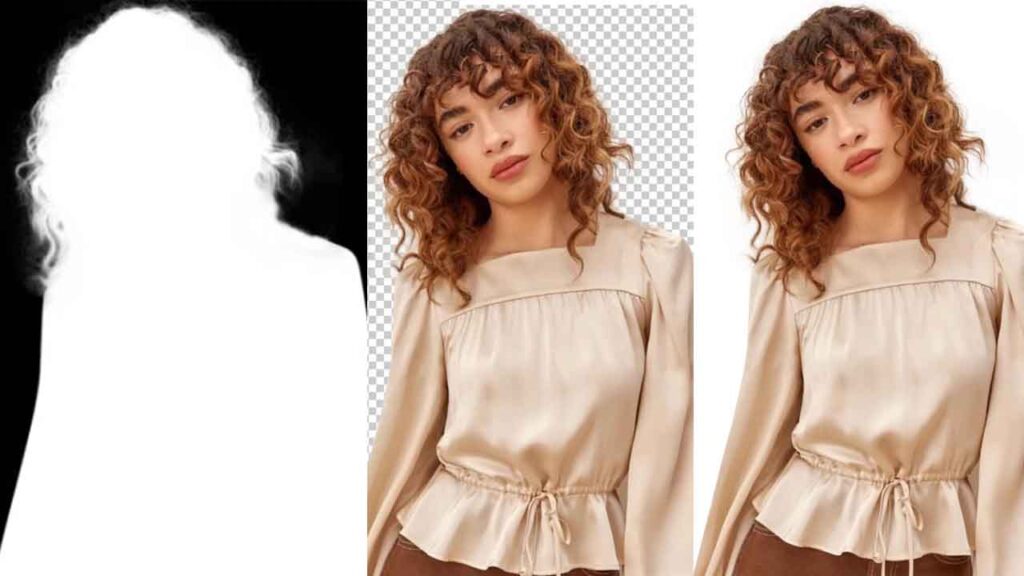
Vector masks are used for precise selections and can be edited using the pen tool. Alpha channel masks are created by selecting specific areas of an image and are helpful in isolating fine details like hair or fur.
Image masking in Photoshop involves using these different techniques to create a selection around the area you want to mask and then refining the mask with various tools and adjustments. This process requires precision and attention to detail to achieve a seamless result.
Once the image is masked, you can make changes to the masked area without affecting the rest of the picture. This allows for more control and flexibility in editing and designing images.
Guide on How to Mask an Image in Photoshop
Masking an image in Photoshop allows you to selectively hide or reveal certain parts of an image without permanently deleting or erasing them. This technique is beneficial when you want to make complex edits or adjustments to an image without affecting the entire picture. In this guide, we will go through the step-by-step process of masking an image in Photoshop.
Step 1: Open the Image
Launch Photoshop and open the image you wish to modify. You can either use the File > Open option or drag and drop the image onto the Photoshop workspace.
Step 2: Select the Layer
In the Layers panel, make sure the layer containing the image you want to mask is selected. If your photo is made up of multiple layers, make sure the layer containing the image is at the top of the layer stack.
Step 3: Create a Layer Mask
At the bottom of the Layers panel, click on the “Add Layer Mask” button (a square with a circle inside). This will create a layer mask that is linked to the image layer you previously selected.
Step 4: Select the Mask
To choose the layer mask, click its thumbnail in the Layers panel. A white border will appear around the thumbnail, indicating that the mask is selected.
Step 5: Choose a Choose a Brush
In order to start masking, you will need to select a brush from the toolbar. The brush tool can be found in the main toolbar on the left side of the screen, or you can press the “B” key on your keyboard to select it. You can choose any brush size and type that you prefer, depending on the level of precision and control you need for your mask.
Step 6: Paint on the Mask
With the mask selected and the brush tool selected, you can now begin painting on the masked image. When painting with black, it will hide the portion of the image that falls within the brush strokes. When painting with white, it will reveal the portion of the image that was previously hidden. You can switch between black and white by pressing the “X” key on your keyboard.
Step 7: Use Other Tools for More Precision
Aside from the brush tool, you can also use other tools, such as the eraser tool, gradient tool, or selection tools, to refine your mask. The eraser tool can help you remove parts of the mask with more control. The gradient tool can create a smooth transition between the hidden and revealed areas of the image. The selection tools can help you make precise selections on the mask for more precise masking.
Step 8: Zoom In and Out for Details
Zoom in and out of your image to get a better view of the details and make sure your masking is accurate. You can use the zoom tool on the toolbar or use the shortcut “Ctrl + +” to zoom in and “Ctrl + -” to zoom out.
Step 9: Save Your Work
Save your work by going to File > Save or by pressing “Ctrl + S” on your keyboard. This will save your image with the applied mask as a PSD file, preserving all layers and allowing you to make further edits in the future.
Step 10: Export Your Image
Once you are satisfied with your masked image, you can export it as a JPEG, PNG, or any other file format by going to File > Export > Export As or by using the “Save for Web” option. This will create a flattened version of your image with the mask applied.
Congratulations! You have successfully learned how to mask an image in Photoshop. Now, you can apply this technique to your future image editing projects and achieve more precise and professional results. Remember to permanently save your work and experiment with different tools to perfect your masking skills.
Advanced Techniques for Masking in Photoshop
1. Refine Edge Tool
The Refine Edge Tool is a powerful feature in Photoshop that allows you to create precise and intricate masks. It can automatically identify and select the edges of an object or subject in your image, making it perfect for complex or detailed selections. To use this tool, select the object or subject in your image using any of the selection tools (such as the lasso or quick selection tool), and then click on the “Refine Edge” button in the options bar. Use the sliders and brush tool to refine the edges until you have a clean and accurate mask.
2. Layer Masks
Layer masks are a non-destructive way of masking in Photoshop. They allow you to hide or reveal parts of a layer by painting the mask in black or white. This gives you precise control over which parts of the layer are visible and which are hidden. To create a layer mask, select the layer you want to mask and click on the “Add Layer Mask” button at the bottom of the layers panel. Use a black brush to hide areas of the layer and a white brush to reveal them.
3. Quick Mask Mode
Quick Mask Mode is a helpful feature in Photoshop for creating masks quickly and easily. It allows you to paint your image using the brush tool and then easily convert the painted areas into a selection. To enter Quick Mask Mode, press the letter “Q” on your keyboard or click on the Quick Mask button in the toolbar. You can then use the brush tool to paint over the areas you want to select. To exit Quick Mask Mode, press “Q” again, and the painted areas will turn into a selection.
4. Color Range Selection
The Color Range tool in Photoshop is a great way to create a mask based on specific colors in your image. To use this tool, go to Select > Color Range. A dialogue box will appear with a preview of your image and a dropper tool. Click on the color in your photo that you want to select, and use the fuzziness slider to fine-tune the selection. Click OK, and the chosen colors will be turned into a mask.
5. Channels
Using channels in Photoshop is an advanced technique for creating masks, but it can be very effective for complex selections. Each channel in an image represents the amount of red, green, or blue in that image, and by looking at and manipulating the channels, you can create high-contrast selections to use as masks. To use this technique, open the Channels panel.
(Window > Channels) and click on each channel to see how it affects the image. Find the channel with the most contrast and duplicate it by dragging it to the “create new channel” button at the bottom of the panel. Use Levels or Curves to further manipulate the duplicated channel until you have a high-contrast mask. Then, use this channel as a selection by holding down Command/Ctrl and clicking on the thumbnail. Finally, go back to the Layers panel and use this selection as a mask by clicking on the “Add Layer Mask” button.
6. Pen Tool
The Pen Tool is a vector-based tool in Photoshop that can be used to create precise and clean selections. With the pen tool, you can create anchor points and curves to outline the object or subject you want to mask. Once you have completed your path, right-click and choose “Make Selection” to turn it into a mask. This method is best for creating hard-edged selections, such as selecting text or logos.
7. Feathering
Feathering is a great way to create a soft and natural-looking edge on a mask. After making a selection with any of the selection tools, go to Select > Modify > Feather. Enter a value for the feather amount (typically between 2-5 pixels), and click OK. This will create a smooth transition between the selected and unselected areas, making the mask blend seamlessly into your image.
8. Layer Blending Modes
Using layer blending modes can also be an effective way to mask parts of an image. Duplicate the layer you want to hide and change the blending mode to “Difference.” This will make the duplicated layer appear inverted. Then, use a layer mask and a brush to paint over the areas you want to reveal. This technique is beneficial for removing distracting elements from a photo, as it allows you to see the differences between the original layer and the masked layer.
Conclusion of how to mask an image in Photoshop
Photoshop provides a variety of tools and techniques to mask an image effectively. By following the step-by-step process of creating a layer mask, using selection tools, and utilizing adjustment layers, one can easily manipulate and hide specific parts of an image to achieve desired effects. With practice and experimentation, the possibilities of masking an image in Photoshop are endless, allowing individuals to unleash their creativity and produce stunning results. So, whether you are a professional designer or a beginner, mastering the art of image masking in Photoshop will enhance your ability to create visually appealing and impactful graphics.
