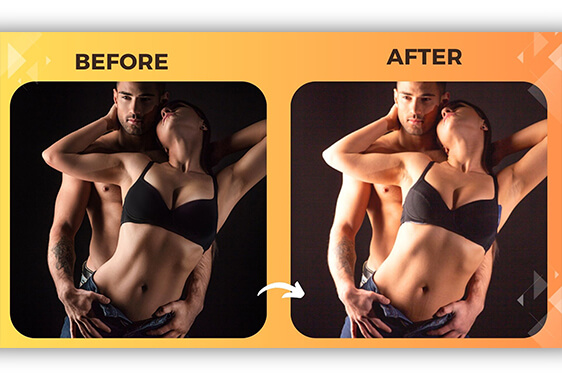
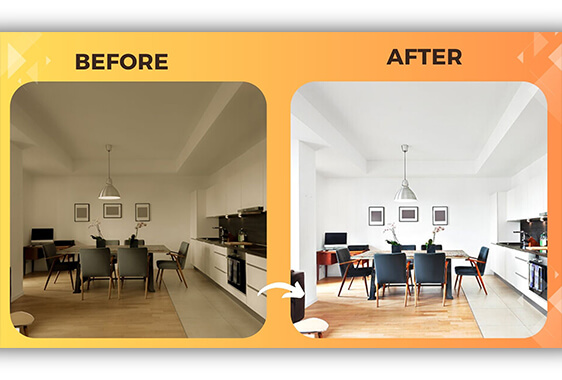
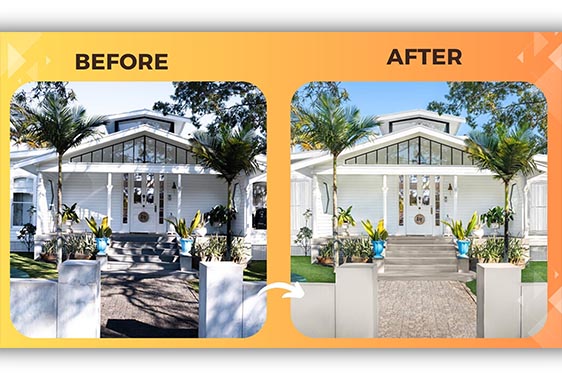
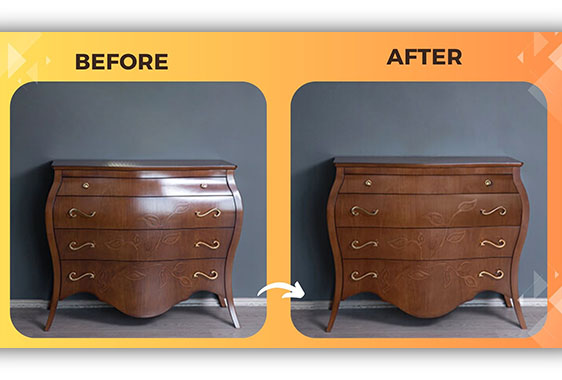
Capturing the perfect photo can be a challenging task, from finding the ideal lighting to capturing the perfect angle. However, even after all the effort put into taking a great photo, sometimes a pesky shadow can ruin the shot. Shadows can be caused by a variety of factors, such as direct sunlight, artificial lighting, or even the position of the subject. They can often create distractions and take the focus away from the intended subject of the photo. But fear not. With the advancement in technology and photo editing software, removing shadows from photos has become an achievable task for any photographer or photo enthusiast. In this guide, we will explore various methods and techniques on how to remove shadow from a photo, allowing you to take your photography skills to the next level and capture the perfect shot every time.
Understanding Shadows in Photography
Before we dive into the techniques of removing shadows from photos, it is essential to understand the role of shadows in photography. Shadows can add depth, texture, and dimension to a photo, creating a more dynamic and interesting image. However, shadows can also be a distraction and take away from the overall composition of a photo. Understanding how shadows are created and how they can affect a photo will help you determine the best approach for removing them.
Causes of Shadows in Photos
The direction of light typically causes shadows in photos. When the light source is behind the subject, shadows will be cast towards the camera, creating a silhouette effect. Shadows can also be caused by the position of the subject, such as when a subject is standing near a wall or another object. Artificial lighting can also create shadows, especially when using multiple light sources.
Techniques for Removing Shadows
There are several techniques for removing shadows from photos, depending on the cause and severity of the shadow. The most common method is through photo editing software, such as Photoshop or Lightroom. These programs offer various tools and features specifically designed for removing shadows from photos. Another approach is to adjust the lighting and positioning of your subject to reduce the shadows. This technique is more challenging but can result in more.

Types of shadows in photography
Understanding the different types of shadows is essential in effectively removing them from photos. Some shadows can be easily removed, while others may require more advanced techniques. The most common types of shadows in photography are:
1. Soft Shadows – created by diffused light and appear as a gradual gradient from dark to light. These shadows are easier to remove as they blend more seamlessly into the image.
2. Hard Shadows – created by a sharply focused light source, resulting in a sharp and defined shadow. These shadows can be more challenging to remove and may require more advanced editing techniques.
3. Cast Shadows – shadows that are cast onto surfaces by an object between the light source and the surface. These shadows can be difficult to remove completely but can be reduced through adjustments in lighting and positioning.
With these different types of shadows in mind, let’s explore some techniques for removing them from photos.
How shadows can enhance or detract from a photo

As mentioned earlier, shadows can add depth and dimension to a photo, creating a more dynamic and interesting image. They can also help to create a mood or atmosphere, depending on the type of shadow and how it is used. For example, soft shadows can create a dreamy or romantic feel, while hard shadows can add a sense of drama and intensity to a photo.
However, shadows can also detract from a photo if they are too distracting or overwhelming. When shadows are too harsh or misplaced, they can take away from the subject and make the image appear unbalanced or cluttered. In these cases, it is important to know how to remove or reduce the shadows to create a more visually pleasing photo.
Knowing how to remove shadows from photos is a valuable skill that can greatly enhance the quality and impact of your images. By understanding the different types of shadows and utilizing various techniques, you can take control of the shadows in your photos and create stunning, professional-looking images. So go ahead and try out these techniques and see the difference it makes in your photography.
Common Causes of Shadows in Photos

1. Direct Lighting: When the light source is directly behind the subject, it can create strong and defined shadows in the photo.
2. Harsh Sunlight: When shooting outdoors, harsh sunlight can create strong and unflattering shadows on your subject’s face or body.
3. Low Light Conditions: In low light conditions, longer exposure times may be required, which can result in blurry or grainy photos and cast shadows from moving subjects or camera shakes.
4. Obstructions: Objects or people in the foreground or background can create shadows in the photo, especially if they are close to the subject.
5. Reflections: Light reflecting off of shiny surfaces, such as water or glass, can create unwanted shadows and reflections in the photo.
6. Bright Backgrounds: If the background of your photo is significantly brighter than your subject, it can create a strong contrast and result in shadows.
7. Artificial Lighting: In indoor settings, artificial lighting can create harsh shadows if it is not diffused or evenly distributed.
8. Low-quality Equipment: Poor-quality cameras or lenses can result in lower resolution and sharpness in the photo, making shadows appear more noticeable.
9. Incorrect Camera Settings: Improper settings such as exposure, ISO, or white balance can cause shadows to be accentuated in the photo.
10. Creative Lighting Techniques:
Sometimes, photographers intentionally use shadows as a creative element in their photos, such as in silhouette shots or using shadows to add depth and dimension to the subject.
11. Shooting at the Wrong Time of Day: The angle of the sun changes throughout the day, so shooting during certain times may result in harsher shadows.
12. Using a Flash: If your flash is the main light source, it can create strong shadows and wash out the subject.
13. Subject’s Positioning: The position of your subject in relation to the light source can greatly impact the presence and appearance of shadows in the photo.
14. Post-Processing: When editing photos, adding or removing shadows can alter the overall look and feel of the image.
15. Natural Phenomena: In certain environments, natural phenomena such as fog or mist can create hazy shadows in the photo.
16. Movement: If your subject or camera is in motion, it can create blurred or distorted shadows.
17. Shooting through Objects: If you are shooting through objects, their presence can create shadows in the photo.
18. Lens Flare: Sunlight or artificial light entering the camera lens can create lens flare, resulting in light spots or streaks that can appear
Tips for Preventing Shadows in Photos
1. Use Diffused Lighting: Instead of direct light, use diffused lighting to soften the shadows in your photos. This can be achieved by shooting in shaded areas, using a diffuser or reflector, or shooting during the golden hour when the light is softer.
2. Adjust Camera Settings: Make sure your camera settings are appropriate for the lighting conditions and adjust them accordingly. Using a lower ISO and adjusting the exposure and white balance can help remove harsh shadows.
3. Change the Angle: Experiment with different angles and positions to find the best lighting for your subject and avoid casting shadows on their face or body.
4. Use a Flash Correctly: If you are using a flash, make sure it is not the main light source. Bouncing the flash off a nearby surface or using a diffuser can help soften the shadows it creates.
5. Move the Subject: If possible, move your subject away from any obstructions or bright backgrounds to prevent harsh shadows and create a more evenly lit photo.
6. Use a Tripod:
Using a tripod can help stabilize your camera and reduce camera shake, resulting in a sharper image with fewer shadows.
7. Use Editing Software: Post-processing can help reduce the appearance of shadows in photos. Use tools such as brightness and contrast adjustments or spot healing to reduce or remove unwanted shadows.
8. Be Mindful of Timing: Pay attention to the angle and position of the sun when shooting outdoors. Shooting during the golden hour or overcast weather can help reduce harsh shadows.
9. Use a Higher Quality Camera: Upgrading to a higher quality camera or lens can improve the resolution and sharpness of your photos, making shadows less noticeable.
10. Practice and Experiment: With experience and practice, you will learn how to anticipate and deal with shadows in your photos. Feel free to experiment with different techniques and settings to find what works best for you.
How to Remove Shadows in Post-Processing

Removing shadows in post-processing is an important skill for photographers to have. It gives them the ability to control the lighting in their images, creating a more balanced and professional look. There are various photo editing software options available, such as Adobe Photoshop, Lightroom, and GIMP, that offer tools specifically designed for removing shadows. In this guide, we will walk through the steps for removing shadows in Photoshop, as it is a popular and widely used software among photographers. We will also provide tips for achieving the best results and alternative methods for removing shadows in post-processing. With these techniques and tools, you can easily remove shadows from your images and give them a polished and finished look.
Overview of different photo editing software options
There are many options for photo editing software, each with its own set of tools and features. Some popular options include Adobe Photoshop, Lightroom, Capture One, and GIMP. When choosing software, it’s important to consider your editing needs, budget, and preference for user interface. For removing shadows specifically, Adobe Photoshop is often the top choice due to its advanced selection tools and brush adjustments. Lightroom also has useful tools for removing shadows, but its capabilities are limited compared to Photoshop. GIMP is a free and open-source alternative to Photoshop, but its interface and tools may be less user-friendly for beginners.
how to remove shadows from photos Step-by-step guide using a popular photo editing software

1. Import the image into the software of your choice.
2. Identify the areas with shadows that you want to remove.
3. Select the “Brush” tool and adjust the size and hardness to your preference.
4. Set the brush blend mode to “Overlay” or “Soft Light” to create a contrast effect.
5. Paint over the shadowed areas with the brush, adjusting the opacity as needed.
6. Use the “Dodge” tool to lighten dark shadows and the “Burn” tool to darken bright areas.
Step-by-step guide on removing shadows using a popular photo editing software
8. Align the clone source with a nearby area without shadows.
9. Use the “Healing Brush” tool to blend and smooth the areas with shadows.
10. Use the “Adjustment Layers” tool to make overall adjustments to exposure, contrast, and luminance.
11. Use the “Curves” adjustment layer to fine-tune the lighting in the image.
12. Once satisfied, save your edited image.
Tips
– Use a stylus or tablet for better control and precision when using brush tools.
– Take your time and zoom in to make precise adjustments.
– Use a soft brush for a more natural and seamless effect.
– If you need more clarification about removing shadows completely, create a new layer and work on that layer instead of the original image.
– Experiment with different blend modes and opacity levels to achieve the desired results.
Alternative methods how to remove shadows from photos
– Using Photoshop layers: Duplicate your image into multiple layers, adjust the blend mode of each layer, and use layer masks to remove or add shadows selectively.
– Dodge and burn techniques: Use the dodge and burn tools or create adjustment layers to lighten or darken specific areas in the image.
– Refining selections: Use the “Refine Edge” tool in Photoshop to refine your selections and make precise adjustments.
Conclusion
Removing shadows from photos can significantly improve the overall quality and aesthetics of an image. Whether you’re a professional photographer or just a casual photo taker, knowing how to remove shadows from photos can take your photography skills to the next level. With the help of photo editing software and an understanding of the different types of shadows, you can easily remove shadows and create visually appealing images.


Real excellent info can be found on